
[col grid=”3-1 first”]
About this shoot for Pacific Ozone ::
Not all the work I do is lyrical, artsy and conceptual. Sometimes there are challenges that don’t necessarily show upon first glance. I’ve worked for the Marketing Director at Pacific Ozone for decades and we’ve done some amazingly creative work together and know each other well. When Bob called me about the potential photo shoot, he knew that this tank was going to be difficult to photograph well. Pacific Ozone makes water purification systems for global clients. Some are boutique breweries and wineries who must have the cleanest, purest water available and some are giant multinationals like Coca Cola, Mexico. The cool part is this process is very friendly to our environment … so I feel really good working for and with them … it’s a great technology.
We built a “cove” on location, inside the production warehouse, around the custom made tank assembly and literally wrapped the entire set in light. I brought 2, 20′ X 20′ silks to the location and tons of extra seamless … and lots of gaffer tape. Importantly, my client’s production schedule in the warehouse kept right on going with forklifts and master welders and craftsmen all around us. They didn’t miss a beat (so therefore the shoot didn’t cost them lost productivity!).
The details are below. Click on the image to the right so you can see it larger.
[/col]
[col grid=”3-2″]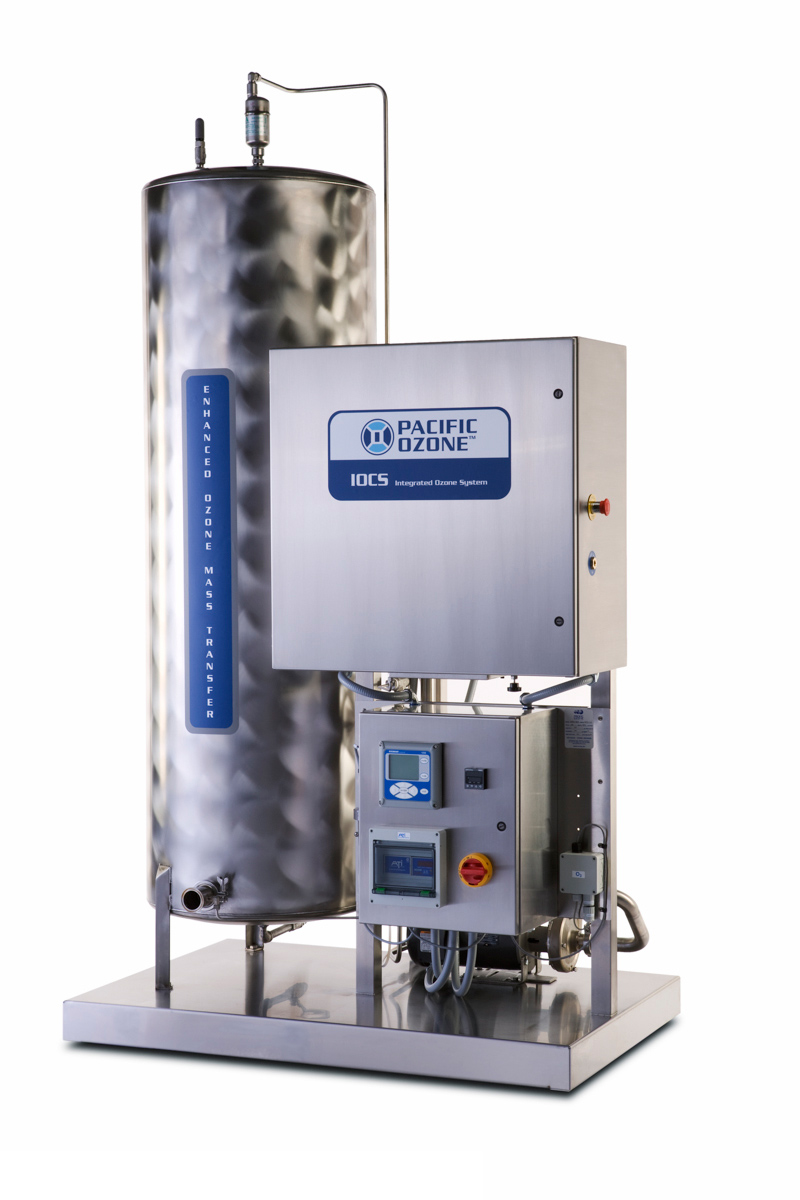
[/col]
![]()
[hr color=”white” width=”50px” border_width=”1 px”]
The Process, What’s the big deal? ::
![]()
[col grid=”3-1 first”]
It’s size
[/col]
[col grid=”3-2″]
This water purification system is enormous, deceptively so.
When I scouted the location, before estimating the project, this custom made tank was being fabricated. It’s 12 ft tall and takes a fork lift or floor jack to move around. After that it needs to be removed from it’s palette. The tank is so reflective, even with the burnishing on it’s surface, that any light source will show up as if you’re looking into a mirror.
The ideal place to photograph this giant tank would be in a full cove, in a studio, with lights bounced off walls so the source would be soft and surround the surfaces, adding depth and value to the shapes. Even though this isn’t a “sexy” object, it’s really a car shoot. Lighting it is the same.
[/col]
[col grid=”3-1 first”]
Solution
[/col]
[col grid=”3-2″]
I brought the studio to the warehouse and created a cove on location. It’s a lot of work but is a lot cheaper and easier than transporting this one of a kind, special machine, to my studio.
To keep costs down I planned the equipment list carefully. Everything was easy to disassemble and fit into my trusty, old, 4Runner. (OK, and on top too … hah, lots was on top!).
[/col]
[col grid=”3-1 first”]
Gear
[/col]
[col grid=”3-2″]
The camera position determined where the set would be constructed in the client’s warehouse. We marked that on the floor first and then took the camera out since they were working and machines were zooming all over the place.
Our main challenge was not just to get a nice looking shot but to STAY OUT OF THE CLIENT’S WAY while they continued to work. We needed a huge area to shoot and build our cove but also had to leave large access and cross areas so other fork lifts could cross through and the factory could stay in production. If we had closed the factory just imagine what the real cost to the client would have been! This all went without saying. Bob and I have lots of trust and he knows I’m extremely sensitive to all the issues involved in a shoot.
Next up, we hung 12 ft rolls of white paper on 2 sides of the set and lit those with 4, 4×6 soft boxes so only bounced light would come back into the set. I flew silks on both left and right sides and bounced the lights back through those using 4 more 2400WS packs and lots of white paper. I’d brought tons of “C-Stands” so there was almost a tent built around the live set by this time. The main light, off to the left, was a huge wall of very soft light coming in through the silk with the lights bounced at very indirect angles so no hot spots would show in the tank … or at least as few as possible. The right side is dialed way back with most of that light coming from the background, reflecting off the metallic surfaces. I flew a boom over the top and added a very soft down light as well. That light barely shows up in little glints and reflections on round parts sticking out but is important to motivate the drop shadow.
After the light was tweaked we carefully placed in white paper all around the tank since our working, white, floor was covered with tracks.
I shot tethered to my laptop and saw it was clean. All that I needed to do in post was clean up the floor and re-create the drop shadow to match what we saw naturally. The only retouching was for a few fingerprints here and there due to moving.
[/col]
[col grid=”3-1 first”]
Post Production
[/col]
[col grid=”3-2″]
I usually like to deliver images that are several layers for potential future use by folks I might not even know, or ever meet. Sometimes a new designer will come along and decide to change the entire background color, for example. So I deliver images that will serve way past the brochure or ad I’m currently working on.
The entire tank was stripped out of the background by hand. I work the old fashioned way and rarely use masking tools. This way any background or even a transparent background could be added later on. Some clients require a clipping path so if they need one, I can simply add that into my final file.
The drop shadow was put on it’s own layer by hand. It’s not a software generated one. This way folks coming after me in the production process have full control over any decision I may have made. If somebody changes their mind later on, changes are easy.
That’s it. Sometimes I take a client’s source art and “enhance” their logo, for example. I always make sure it’s not cheesy looking or obvious. I deliver images like this in multiple formats so any future use is possible. I almost always deliver color corrected, CMYK hi res files along with everything else. I’ve had so much experience in print over the years I know it’s not just a simple file format conversion that’s needed, even though the software will perform that task. Images destined for print actually look way different on screen because of the magic, and peculiarities, of inks on paper … all sorts of papers!!! … and various printing methods. Just because a lot of budgets have imploded to the point where there are fewer people in the loop with expertise doesn’t mean things have to look lousy. I give it my best shot, assuming someone after me will appreciate and take advantage of my extra effort.
[/col]
[col grid=”3-1 first”]
So, why this case study?
[/col]
[col grid=”3-2″]
It’s pretty simple. A lot of folks are doing their own photography these days and / or trying to get their photographic needs met on extremely tight budgets. The intention of this case study is to show what happens when a lot of trust exists between client and photographer; and, also to show what’s possible even on pretty tight budgets. I could have approached this shoot the easy way, shown up at the site, without scouting, and brought in a couple of soft boxes and a small roll of seamless but I chose to do it the way that produced the best possible image.
[/col]
[col grid=”3-1 first”]
What’s still not right? What would I change?
[/col]
[col grid=”3-2″]
The maximum height of my stands, on location, was reached; and I made sure to bring all very tall light and background stands. The set was over 12 ft tall on all sides including behind the camera (remember … reflections!) but you can still see a darker area near the top of the tank where it “saw” up and over the set. In studio, that could be overcome; but the added costs and value of that would have also been prohibitive. This machine was one of a kind, made for a specific client, so really couldn’t have been moved without a lot of risk. I brought those tones down in post to where most people don’t even notice so, in balance, it’s fine.
I’ve photographed entire mainframe systems valued well into the millions of dollars in the studio before. Armed guards needed to be on watch while we were home sleeping in between shoot days. I’ve had lots and lots of one – of – a – kind props, prototypes, cars and especially people in studio as well. Each project is always relative to each specific client’s needs and of course, budget. Bringing not only tons of expensive studio gear on location but the knowledge of how to really work with light, anywhere, is the real value I add when my clients are looking for solutions.
[/col]
![]()
[hr color=”white” width=”50px” border_width=”1 px”]